DYEING IT YOURSELF
- Freshlight Malaysia
- Mar 18, 2022
- 3 min read
Updated: Mar 23, 2022
You've come to the ideal spot if you can't get to your favorite salon but want to refresh your color or attempt a bold new style at home. This Guide will show you how to apply Freshlight hair dye and make your new color look its best! Keep reading to learn all you need to know about getting the ideal at-home hair color, whether you've been dying your hair for years or this is your first time.

What Color Suite’s You the Most
Freshlight offers a variety of choices, coming in 5 different ranges – Berry Ash, Sweet Mocha, Lemon Blonde, Melty Cherry, and Sugar Ash. With such a huge variety of choices, picking a hair color that suits your skin tone may seem like an endless task, but with our guide its Fool-Proof
You must first identify your skin's undertones before choosing a hair color. The majority of people may be classified into one of three categories: warm, cool, or neutral. It might be difficult to figure out where your complexion falls, below is a quick guide on how to identify your skin tones.
| Cool Undertone | Warm Undertone | Neutral Undertone |
Fair Skin | Lemon Blonde/ Melty Cherry | Berry Ash/Sugar Ash | Melty Cherry/Sweet Mocha |
Medium Skin | Sweet Mocha/Lemon Blond | Berry Ash/Sweet Mocha | Sugar Ash/Melty Cherry |
Deep Skin | Sweet Mocha/Sugar Ash | Berry Ash/Sweet Mocha | Melty Cherry/Lemon Blond |
Step-By-Step Guide to Freshlight
Once you have chosen the ideal color that matches you the most, you can start the DYEING process. Before starting the process, using gloves during the process is recommended. Once you opened the box you will find three items inside. A white container for the developer, a black bottle for the hair color mixture, and a blue packet for the Moisture Hair Mask.

Step 1: Mixing the Solutions
After preparing all the items needed, we will now begin mixing the solutions for the perfect hair dye for you. Firstly, take the black bottle for the hair dye mixture and pour it directly into the white container given to you.
After you have poured every drop of hair dye mixture into the white container, slowly tilt the bottle from left to right around 5 to 10 times to ensure the solutions have been mixed well. Once this is done, put on gloves if you have any and squeeze the mixture out from the white container, the final products should be white foamy and fluffy. After this, we are almost done with the whole process.
Step 3: Applying the dye
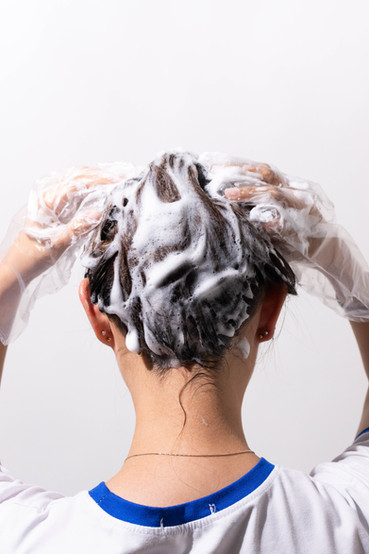
Many people may think that this step can be quite daunting and frightening, but with this guide, it will be as easy as 1 2 3. First, squeeze the mixture in the palm of your hair, holding a good amount. Apply the foam starting from the top of your head down to the ends, once applied to blend the foam into your hair.
For the next part, we will move on to the back of the hair, first separate the back of the hair into two parts making it look like bunches, and apply the foam directly on the hair and blend it well. For the tip of your hair, grip the ends to ensure that the foam is blended well. After all the foam is applied evenly, use your fingers to comb starting from the bottom to the top, this will ensure that the foam will get distributed evenly. Leave the foam in your hair for 20 – 30 mins letting the mixture set in your hair.
Step 4: Finishing
After 20–30 minutes, carefully rinse the hair combination with hot water. Once the mixture has been washed out, shampoo your hair twice to eliminate all the colorants, since keeping colorant in your hair over time may damage or change the color of your hair. After shampooing, add conditioner to assist establish a protective barrier, preventing the hair color from washing out too rapidly.

Remember: take it slow, follow the step-by-step guide, and you’ll be coloring your hair like a pro
Until Next Time
X0X0
Freshlight MY

_edited.png)


